DTF transfers have transformed how small businesses and creators customize garments, accessories, and fabric goods, offering a flexible, scalable path into apparel decoration while opening new opportunities for hobbyists and micro-brands to experiment with limited runs and personalized designs. If you’re evaluating how to start DTF printing, the right equipment and tools matter just as much as your design skills, guiding you from concept through setup to first orders, reducing downtime, and helping you manage a lean startup budget by prioritizing reliable components, clear specifications, and scalable workflows. To optimize outcomes, you’ll want to understand the DTF transfer process and invest in dependable DTF printing equipment, from reliable printers with white ink capability and CMYK support to compatible RIP software, finishing gear like curing units, and sensible maintenance routines that keep downtime low. A practical setup also includes choosing compatible DTF transfer machines and the right DTF inks and films to deliver clean whites on dark fabrics and vibrant CMYK on lighter ones, while considering powder adhesion, film quality, and the balance between upfront cost and long-term durability. With a clear workflow—design, print, powder, cure, transfer, and finish—you can balance budget and ambition while building repeatable quality that keeps customers coming back, and you’ll appreciate how methodical equipment choices underpin consistent results across runs.
From a terminology perspective, the same process is often described as direct-to-film decoration, film-based textile printing, or transfer-on-film technology, highlighting the carrier film, adhesive, and heat-press step. These alternative terms emphasize the workflow—printing on a film, powdering, curing, and pressing—without changing the core idea of transferring a design onto fabric. When researching or marketing, you’ll encounter related signals such as color management, substrate compatibility, and production efficiency, which are the semantic cues that help search engines index the topic more robustly. In short, the concept remains the same across variations: printable film, binding agent, and controlled heat to produce durable, vibrant results on textiles.
Understanding DTF Transfers: What It Is and Why It Matters
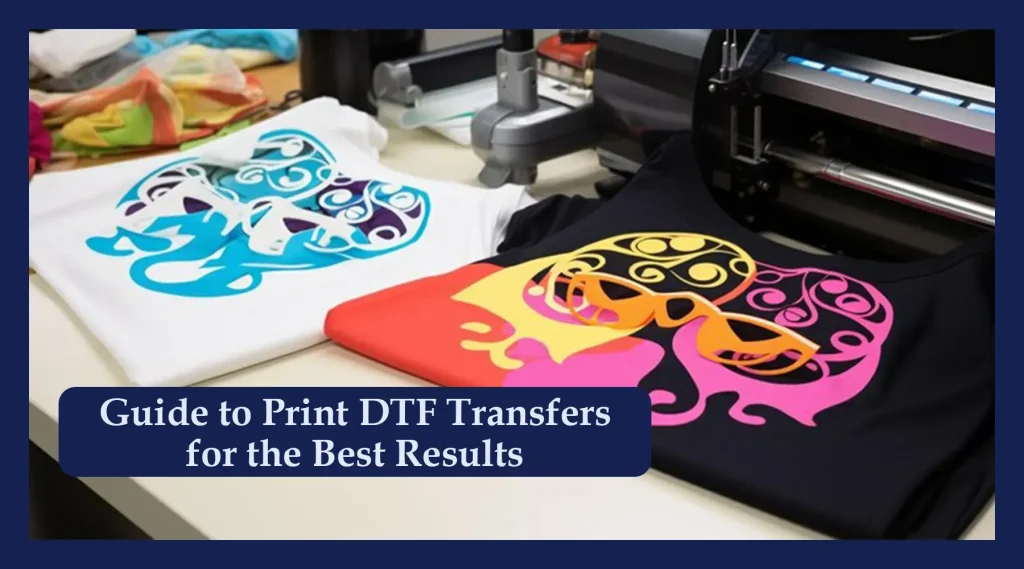
DTF transfers are a hybrid process that uses a film-based print to create durable designs on textiles. The DTF transfer process starts with printing a design onto a specially coated film, followed by applying adhesive powder, curing, and then pressing the film onto fabric with heat. This approach hinges on reliable DTF printing equipment that can handle white ink deposition as well as vibrant CMYK colors, ensuring clean prints across light and dark fabrics.
For creators and small businesses, understanding the DTF transfer process helps in selecting gear that scales. A well-planned setup focuses on consistent color output, straightforward workflow, and a finishing routine that yields durable results customers will trust. By mapping each step—printing, powdering, curing, and transferring—you can forecast costs and deliver predictable timelines even as you grow.
Essential DTF Printing Equipment: From Printers to RIPs
Your core DTF printing equipment includes the printer capable of white ink and CMYK on DTF film, plus robust RIP software to manage color, trapping, and ink density. You also need reliable maintenance access and parts, so you aren’t stuck mid-run. Pair the printer with a computer-based workflow that translates designs into printable color profiles that minimize ink waste.
Beyond the printer, choose supporting tools like heat-resistant mats, a clean curing area, and routine consumables. When evaluating DTF printing equipment, consider print head quality, feed accuracy, and the availability of compatible inks and films to reduce downtime. A smart investment now reduces headaches later as you scale your operation.
Choosing DTF Transfer Machines and Heat Presses for Home and Small Shops
DTF transfer machines and heat presses form the core of the finish step. The transfer machine concept centers on getting the printed film aligned on the fabric and applying controlled heat and pressure to fuse the ink and powder into the textile. For small shops, a sturdy manual heat press is often enough to establish a reliable workflow.
Look for heat presses with even heating, accurate time controls, and stable pressure; larger sizes (such as 16×20 or 20×28) unlock bigger designs or multi-item runs. Some shops explore conveyor or semi-automatic options to speed powdering and transfer, but these add cost and space; start with a quality manual heat press to learn the DTF transfer process before expanding.
DTF Inks and Films: Quality Components for Colorful, Durable Results
DTF inks and films determine color brightness, opacity, and wash durability. White ink is essential for vibrant designs on dark fabrics, so verify that your ink set offers strong white deposition and clean separation with your RIP. The film should feed smoothly and hold up during transfer without excessive gloss loss or bleed.
Choosing the right DTF inks and films also means matching them to your printer and the film type you’re printing on. Look for low-bleed substrates, reliable white layer performance, and compatibility with your workflow. Testing swatches on multiple fabrics helps you predict how colors will render after the DTF transfer process and during washing.
How to Start DTF Printing: A Practical Starter Workflow and Budget
How to start DTF printing begins with a clear plan that maps out your equipment, budget, and target market. Decide on a proven DTF printing equipment combo that includes a printer with white ink, a suitable heat press, and basic DTF inks and films, plus a powder shaker and curing option. Establish a workflow that covers design, test prints, powdering, curing, and transfer.
To manage costs and timelines, use a practical starter budget that accounts for consumables, maintenance, and space. Learn how to start DTF printing efficiently by seeking training, joining user groups, and collecting supplier samples before committing to larger purchases. Document your initial results to refine pricing and turn initial orders into steady revenue.
Finishing, Curing, and Maintenance: Protecting Your DTF Transfer Investment
Finishing, curing, and post-processing complete your DTF transfer workflow. After printing and powdering, the cure step fuses the powder to the film so it transfers cleanly under heat. Then the transfer to the garment and the peel stage determine the final appearance and durability of your design.
Maintenance and safety are essential for long-term success. Regularly clean print heads and rollers, calibrate color profiles, and inspect heat elements for hot spots. A routine maintenance plan extends equipment life and preserves consistent results that keep customers coming back for more.
Frequently Asked Questions
What core pieces of DTF printing equipment do I need to start DTF transfers?
To begin DTF transfers, you’ll want a reliable DTF printer capable of white ink and CMYK, a heat press or DTF transfer machines, quality DTF inks and films, an adhesive powder and a powder shaker, curing capability, and a clean workspace with suitable substrates. Prioritize durable parts and dependable support to minimize downtime and simplify maintenance.
How does the DTF transfer process work from design to finished garment?
In the DTF transfer process, start with a design and print it onto DTF film using DTF inks and films, ensuring proper white ink deposition for dark fabrics. Dust the print with adhesive powder, cure the powder, place the film on the fabric, and apply heat and pressure with a heat press or DTF transfer machine. Finally, peel away the film and complete any finishing touches.
What should I consider when choosing DTF transfer machines and a heat press for a small shop?
For a small shop, assess heat press size (12×12 to 20×28 inches), even heat distribution, accurate timers, and reliable pressure. Decide between manual or semi-automatic DTF transfer machines based on volume, space, and budget, and ensure compatibility with your workflow and powders.
How do DTF inks and films influence color quality, and what should I look for when selecting them?
DTF inks and films determine color vibrancy and durability. Look for inks that deposit white reliably and provide strong CMYK coverage, with RIP software compatibility. Choose DTF films with low ink bleed and smooth feeding to ensure clean transfers and consistent results.
How can I start DTF printing on a budget without sacrificing quality?
Start with a sensible starter setup: a dependable DTF printer, a mid-size heat press (15×15 or 16×20 inches), standard DTF inks and films, a powder shaker, and a curing option. Focus on building a repeatable workflow, test prints on light and dark fabrics, and request supplier samples to validate print quality before expanding.
What are common pitfalls in the DTF transfer process and how can I avoid them?
Common pitfalls include inconsistent white ink, uneven powder coverage, substrate mismatches, and improper curing. Avoid these by validating white deposition, using a quality shaker for powder, testing fabrics early, and following film instructions for timing and temperature in the DTF transfer process.
| Topic | Key Points |
|---|---|
| What are DTF transfers? |
|
| Core equipment you need to start DTF transfers |
|
| DTF transfer machines and the heat press |
|
| Inks and films (DTF inks and films) |
|
| Powder and curing equipment (DTF powders and curing steps) |
|
| Substrates, surfaces, and finishing tools |
|
| Safety and maintenance essentials |
|
| Putting it all together: your DTF startup workflow |
|
| Budgeting and choosing the right gear |
|
| Quality, consistency, and testing |
|
| Maintenance and care: extending the life of your equipment |
|
| Common pitfalls and how to avoid them |
|
| Practical tips for beginners starting with DTF printing |
|
Summary
DTF transfers offer a practical path into customizable garment printing, balancing quality, cost, and scalability. By prioritizing core equipment—the DTF printer, a reliable heat press, appropriate inks and films, adhesive powder and curing tools—and establishing a clean, efficient workflow, you can launch a productive DTF printing business. As demand grows, you can expand to larger formats, more printers, and automation options, while maintaining control over quality through consistent testing and routine maintenance. With careful selection, ongoing testing, and disciplined cost tracking, your DTF transfers operation can deliver vibrant, durable results that keep clients coming back for more.

