DTF transfers have transformed fabric printing by delivering vibrant color, a remarkably soft hand feel, and the flexibility to print on a wide range of garments, from basic T-shirts and hoodies to performance fabrics and even light athletic wear, making it a versatile choice for small shops and hobbyists alike who are looking to differentiate their offerings. To maximize consistency across materials, apply DTF printing tips that emphasize selecting high-quality film, careful ink calibration, precise color management, and thoughtful underbase planning to ensure vibrant results on both light and dark substrates, even when run in high-volume production. Understanding DTF heat press settings is essential for sharp detail, minimal ghosting, and reliable adhesion, whether you’re pressing standard cotton blends, polyesters, or more challenging fabrics with texture and varying weave across all surfaces. If you encounter issues, DTF transfer troubleshooting steps can save time and reduce waste by guiding you to the right adjustments in transfer film, glue, or print settings, and documenting changes helps you refine processes. With quality inputs, deliberate design, and methodical testing, you can achieve durable DTF transfers that stand up to washing, repeated laundering, and everyday wear, delivering consistent color and adhesion over time, creating a repeatable, scalable workflow.
In the landscape of garment decoration, the digital-to-film transfer process offers a film-to-fabric route that uses adhesive-backed sheets to move graphics onto textiles with impressive fidelity. LSI principles encourage referencing related concepts such as heat-applied graphics, specialty films, ink formulations, and cure-time considerations to help search engines associate the topic with practical workflows. Practitioners often design with the substrate in mind, coordinating underlayers, color layers, and finishing steps to achieve bright images that survive washing and regular wear. To scale production, it helps to standardize film choices, adhesive formulations, and peel methods, while documenting test results so operators can reproduce consistent outcomes across batches. Ultimately, understanding these computationally similar workflows and material interactions strengthens your capability to deliver reliable, high-quality prints across fabrics, colors, and garment types.
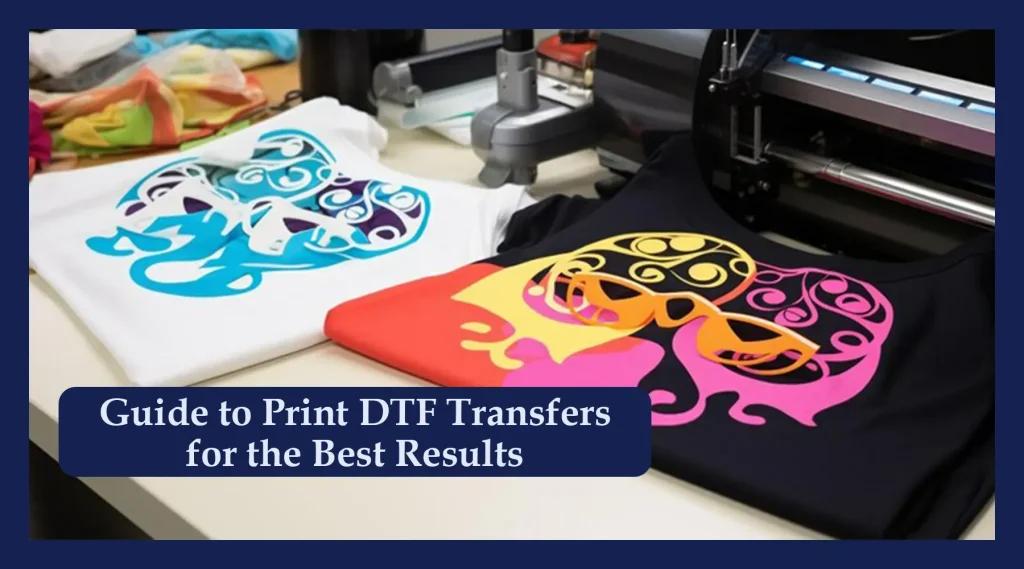
DTF Transfers: Start with Quality Materials
The foundation of exceptional DTF transfers is the quality of the film, inks, and adhesive you choose. Use a reputable DTF film designed for your printer, compatible inks, and a reliable glue. Cheaper films can ghost, dull color vibrancy, or misbehave during adhesion, and these issues hamper every step of your workflow. This emphasis aligns with core DTF printing tips that stress input quality as a top driver of print success.
Investing in quality inputs reduces downstream issues and supports durable DTF transfers. This is a central part of how to do DTF transfers effectively, because strong materials minimize color shifts, edge fuzz, and poor adhesion, helping you achieve clean, repeatable results.
Design and Color Management for Crisp DTF Transfers
Design at high resolution (ideally 300 DPI at the final print size) and manage color with a calibrated monitor, consistent color profiles, and appropriate settings. This approach mirrors professional DTF printing tips and helps ensure the final transfer matches your design intent with sharp details.
Plan white underbase and color layering with clarity—order, opacity, and shading all matter. This preparation reflects how to do DTF transfers effectively, ensuring vibrant colors on dark fabrics and controlled opacities across print areas.
Printer Calibration and Color Fidelity for Accurate DTF Transfers
Printer calibration pays off through regular head alignment, nozzle checks, and test prints using ICC profiles tailored to your ink-film combination. These practices improve color accuracy and repro quality, reducing the need for post-press adjustments and supporting reliable DTF transfer troubleshooting when issues arise.
Maintain consistent feeding and routine cleaning to reproduce hues and details across batches. Regular calibration and maintenance underpin durable DTF transfers by stabilizing color, texture, and adhesion under repeated use.
White Underbase Strategy and Layering for Durability
Plan a white underbase to maximize color vibrancy on dark fabrics, and test underbase thickness to balance opacity with print feel. A well-considered underbase is a core component of durable DTF transfers and helps colors sit cleanly on diverse garment colors.
Layering strategy matters for both appearance and durability. Keep layer order simple where possible, minimize edge artifacts, and validate each layer’s adhesion. This mindful approach strengthens durability and improves washfastness across multiple runs.
Garment Preparation and DTF Heat Press Settings
Pre-press the garment to remove moisture and wrinkles for several seconds, creating a flat, stable surface for a clean transfer. Proper garment prep reduces shrinkage, ghosting, and edge misregister—precisely the kind of setup covered in practical DTF printing tips.
Set accurate heat press parameters to suit your film and fabric. A common starting point is about 160–165°C (320–330°F) with medium pressure for 12–15 seconds, followed by a brief cooldown under pressure. Tailor these DTF heat press settings to your specific garment and transfer film, and document results to dial in the exact values for your setup.
Finish, Peel Techniques, and Post-Press Care for Long-Lasting DTF Transfers
Peel timing affects edge sharpness and color integrity. Practice warm/hot peels and, for delicate layers, cold peels on sample garments to determine the best method for your inks and films. This practice supports better outcomes and is a key component of DTF transfer troubleshooting in real-world scenarios.
After peeling, allow the print to cool on a clean surface and avoid bending the garment while it’s hot. Document results and refine your process over time to consistently produce durable DTF transfers with strong wash-fastness and long-lasting color.
Frequently Asked Questions
What are DTF transfers and how do you do DTF transfers to get vibrant results?
DTF transfers are printed-on-film designs that are heat-pressed onto fabric using an adhesive. To do DTF transfers effectively, start with quality film and inks, design at high resolution (recommended 300 DPI), and use calibrated color management. Then press at the recommended temperature, time, and pressure, using a non-stick surface and the correct peel method to ensure vibrant color and durable adhesion.
What are common DTF transfer troubleshooting steps?
DTF transfer troubleshooting starts with verifying input materials (film, ink, adhesive) and confirming printer calibration and color management. Check the white underbase and layering order, ensure correct peel method, and test a sample garment to identify misregistration, ghosting, or color shift. Document issues and adjust settings accordingly for durable results.
What DTF heat press settings are recommended for best results?
DTF heat press settings vary by film and fabric, but a common starting point is 160–165°C (320–330°F) with medium pressure for 12–15 seconds, followed by a brief cooldown under pressure. Always follow your film supplier’s guidelines and adjust for fabric weight and finish. Use a protector sheet and a clean, non-stick surface to protect edges.
How can I ensure durable DTF transfers that last after washing?
Durable DTF transfers depend on proper prep and cure. Pre-press the garment to remove moisture, apply the transfer with correct temperature/time/pressure, and allow a proper cooldown to cure the adhesive. Use a protector sheet, and avoid bending the print until fully cured to maximize wash-fastness.
What DTF printing tips help improve transfer quality?
DTF printing tips include starting with high-quality materials and maintaining calibration, printing at high resolution with accurate color management, and testing with sample garments. Design with a proper white underbase and layer order to maintain vibrancy, then verify adhesion and durability after pressing.
How to do DTF transfers: a quick-start guide for beginners?
Here’s a quick-start for DTF transfers: choose quality film and inks, design at 300 DPI, print with accurate color management, pre-press the garment, press at the recommended temperature/time/pressure, and peel and cure according to film guidelines. Always test with sample garments to refine your process and document results.
| Tip | Focus Area | Key Takeaway |
|---|---|---|
| 1. Start with quality materials | Materials | Use reputable DTF film, inks, and adhesive to reduce ghosting and improve color vibrancy and adhesion. |
| 2. Design at high resolution and manage color properly | Design & color management | Create 300 DPI designs at print size; calibrate monitors, use ICC profiles, and plan white underbase to keep colors vibrant. |
| 3. Calibrate your printer and use reliable color management | Calibration & color accuracy | Regularly align heads, check nozzles, test prints, and maintain consistent feeding; use tailored ICC profiles. |
| 4. Plan for white underbase and layering | Underbase & layering | Anticipate white underbase on dark fabrics; design with layers in mind to improve opacity and color richness. |
| 5. Prepare the garment properly before pressing | Garment prep | Pre-press to remove moisture/wrinkles; use a clean surface and align garment to prevent misregistration. |
| 6. Choose the right transfer film and follow the pressing method | Film & press method | Match film with recommended cure time and peel method; hot peel is common for sharp edges and easy removal. |
| 7. Set accurate heat press temperature, time, and pressure | Heat settings | Start around 160–165°C (320–330°F) for 12–15s with medium pressure; adjust for fabric and film, and document results. |
| 8. Protect the print with the right surface and technique | Protection & technique | Use non-stick/silicone sheets to distribute heat and avoid print migration; let adhesive cure without movement. |
| 9. Peel technique and post-press handling | Peel & post-press handling | Warm/hot peels often yield cleaner edges; allow cooling and avoid stretching to maintain durability. |
| 10. Test, document, and refine your process | Testing & documentation | Create test plans for new batches; record temperature, time, pressure, peel method, fabric, and results to improve consistency. |
Summary
Conclusion: Mastering DTF transfers involves balancing quality inputs, precise design, careful pressing, and ongoing testing. By following these top tips for DTF transfers, you can achieve consistent, durable results on a wide range of fabrics. Keep refining your process, follow manufacturer guidelines for your film and ink, and maintain a results log to ensure vibrant colors, sharp details, and reliable adhesion in every project for DTF transfers.

